
Portfolio
Engineering programs teach you how to think and this portfolio shows you how I work. The projects here aren’t class assignments they’re work I took on outside of school, on my own time, because I wanted to go further than the curriculum goes. No rubric, no guided steps. Just a problem, the tools, and figuring it out.
What you’ll find here is a record of how I spend the time between classes building skills, working through real engineering challenges, and closing the gap between theory and practice before I ever step into a professional role. I’m actively looking for an internship where I can bring that same initiative to a real team and a real project.
I'm still working on more, and even though I don't have much. It still shows the work I'm putting in.
NAR -National Association of Rocketry

This project was my path to earning a Level 1 high-power rocketry license. The first step was selecting a qualifying kit I went with the EZI-65, a 57.75" rocket powered by an Aerotech AE-I284W14A 36/600 motor.
When I first saw it next to friends who were working on their Level 2 builds, I wasn’t expecting mine to be that large but it held its own. Assembly used epoxy, CA glue, sandpaper, masking tape, and a drill, with finishing done in Montana Granit, Montana Gold, Montana Metallic, and Tamiya Color spray paints.
The build itself was straight forward for the most part, but two problems gave me real trouble. The first was a broken motor retention screw and it snapped during drilling, and the kit only comes with two. One screw wasn’t enough to hold the motor securely, so I had to track down a replacement with the same thread count and dimensions. It took four separate hardware store trips before I found the right one.
The second issue was more involved. The centering rings were spec’d for a 4" inner diameter, but once I was working inside the main body tube I realized there was a secondary inner wall that brought the actual clearance down to 3.85" nearly an eighth of an inch tighter.
That meant sanding down the centering rings to fit, with no reference point for how much material to remove. It came down to trial and error: sand a little, test the fit, repeat until they seated correctly.
HTML - Terminal
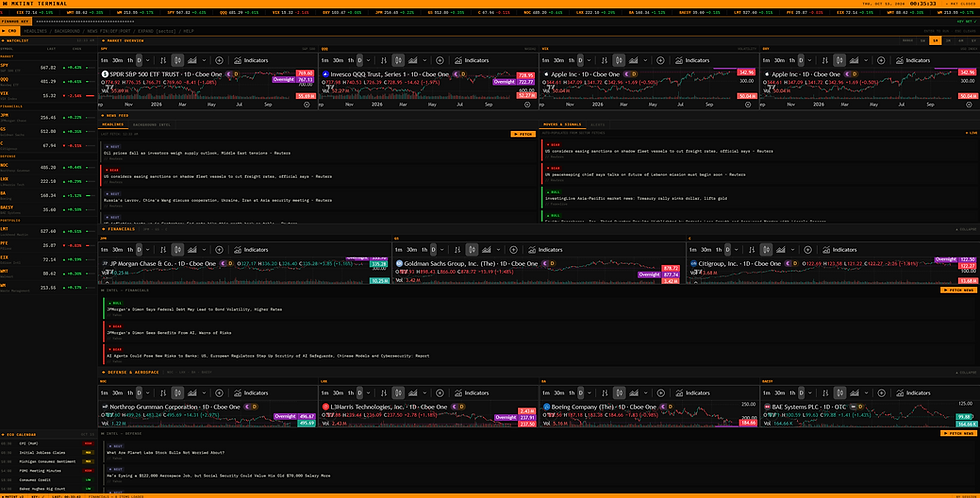
Vision 2
This project started from pure curiosity. I got interested in stocks and quickly realized that keeping up with the market meant doing a lot of reading, jumping between news publications, switching between brokerage platforms, and trying to piece together a full picture from multiple sources.
No single place had everything I wanted to see at once.
So I started building my own. The first version was rough, a basic HTML page that tracked stock prices and pulled in some news. It didn’t work great, but it was taking shape, and I kept making small improvements over time.
At some point I came across Bloomberg Terminal. It’s the industry standard for real time financial data on Wall Street, one platform that shows live prices, analytics, and news from multiple sources. The main thing is that it cost around $24,000 a year. And it’s built for banks and hedge funds, not someone learning to invest on their own.
That became my reference point. I redesigned my HTML dashboard to follow Bloomberg’s approach, dense, data forward, built around fast access to the information that actually matters. The aesthetic is modeled after the
terminal itself: dark background, high-contrast text, everything visible at a glance.
The last major piece was integrating a live news feed. To pull real-time data into the page, I connected a financial news API, a way for my dashboard to communicate directly with an external data source and request up-to-date information on demand. The goal was to surface news from multiple angles so I wasn’t limited to one outlet’s framing of the market.
SolidWorks

Most people jump straight into modeling and it’s the fun part. But this project was specifically focused on what comes after: the details that actually determine if a part works in the real world.
The main areas I worked through were tolerances, fit tolerance, material shrinkage, and draft angles; things that are easy to skip but critical when a part needs to be manufactured or assembled correctly. Alongside that, a big part of the project was learning how to produce detailed technical drawings that leave no room for interpretation. Clear dimensions, proper annotations, nothing assumed.